I've toyed with the idea of toy-making for a while, without actually taking the plunge and making anything. But what about my Owl pyjama-case? Well, I'm choosing not to count him as a toy, but as storage solution. Which means that when I see him about the bedroom, he represents tidiness rather than clutter.

Who knew that an orderly life could be achieved so easily?
(If only I could find a similar solutions for every other room in the house.)
Meanwhile, here's what I did to make him...
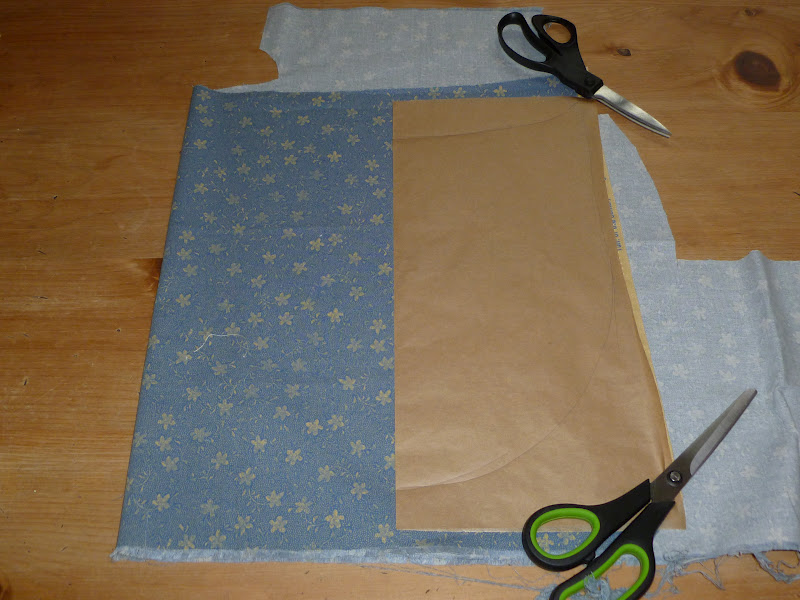
His size was dictated by the size of my fabric. I folded it in half, and cut a piece of paper to match.

Then I folded the paper lengthways, and drew in one half of the owl pattern. The top of his head was a horizontal line starting at right-angles to the folded edge, curving up slightly at the end for the tufts of his ears. Owl's body was formed with a long 'J' shape from the point of his ears down to meet the fold again at right angles - just visible on the next photo.
I opened out the pattern to give my owl template, and cut out one front piece from the main fabric, and one from the fleece lining fabric.

Then I cut two back pieces from the main fabric and two from the fleece, using the template folded in half lengthways (as it was originally drawn).

The pieces so far:

Next Owl needed some features. First of all, a tummy piece which doubled as a pouch (surely that should come in useful sometime***?). I folded the pattern piece top-to-bottom, leaving a crease across the middle....

... and used that crease a a template to cut the tummy piece, placing the folded line of the pattern on the folded edge of the fabric, so the only raw edges were on the outside curve.

Now Owl needed some wings. I drew a wing, as above, and cut it out with added seam allowances to the inner edges - the outer edge already had a seam allowance included. Then top of the wing needs to be above the line of the tummy / pocket, so that it can be sewn down later on.

I used my wing template to cut two wing pieces in three different fabrics: front, back and a fleece middle layer to give the wings some plumpness.
Next, Owl needed some big round eyes. I used a glass to draw my circle, and then backed it with Bondaweb ready to applique onto Owl's face later on.

On to Owl's feet. I drew a three-toed foot using the outer edge of the body template as a guide...

... and then cut the foot template out with a 1cm seam allowance added on all around, and used it to cut a front and back piece for each foot.

The pieces so far: pocket/pouch (seen unfolded here); body - front and back in outer fabric and fleece lining; feet - front and back; wings (each of those pieces is cut as a double layer); and two eyes, both backed with bondaweb.

Have you spotted that Owl has no beak? His original triangular beak (seen here when I was playing with the pattern pieces) didn't work out quite right.

Instead the beak pieces needed to be shaped like a diamond with one point missing - as seen here:

Time to put it all together at last!
First I folded my pocket piece in half with wrong sides together, and edge-stitched across the top.

Then I stitched it in place, and ironed the eyes in place as well.

For Owl's feet, I cut out the actual foot pattern piece (leaving only the seam allowance where it would attach to the body)...

... and used it as a template to sew together my foot pieces, right sides together, leaving the top edge open.

Then I trimmed the seam allowances, turned the feet right-side-out...

... and added a little bit of polyester stuffing to make them squidgy.

I pinned and stitched them in place on Owl's bottom edge.

I pinned the wing pieces together, with the right sides of the patterned fabrics facing each other, and stitched around the curved edges, leaving the straight top edges open.

Then I trimmed the seam allowances, and turned them right-side out.

I edge-stitched the wings in position, leaving room for seam allowances on the front body piece.

Then I stitched the two beak pieces together, leaving the top open...

... folded the open top seam inside, and added just a whisper of stuffing...

... before stitching Owl's beak onto his face across its top (open) edge.

I spent a long, long time choosing buttons for Owl's eyes, and then added a running stitch around the bondaweb/applique pieces.
Hooray: front piece done!
(I had an interlude for tea and biscuits to celebrate.)
Now for the back. I thought that Owl might see some rough handling in his life, so I reinforced the zip at the top and bottom with scraps of the floral fabric from his pouch. I simply folded these and placed them over the ends of the zip, with the folded edge inwards.

Then I sandwiched the zip between one of the back pieces and one of the back lining pieces, right sides together, stitched and pressed, and did the same for the other side.

Back piece done!

I put the decorated front piece on top of the back, with their right sides facing each other, and
then placed the front lining piece on top...

... pinned all the way around the edge, being very careful not to catch the wings...

...and stitched it all together.

Turned and pressed: ta-dah!

Here's Owl in action - filled with pyjamas and looking plump and cuddly. He's been used every day since he was made, has survived the washing machine, and has been out for a bath-time playdate with toothbrush and toothpaste in his pouch (see *** above).

Son #1 likes him, and has requested a bear. How shall I do that?
SUPERBE MERCI POUR CETTE MERVEILLE BISES
ReplyDeleteharika olmuş ..çok beğendim ...
ReplyDeleteGreat for hiding a unfinished cloth project.
ReplyDeleteHi! Can I copy your Tutorial for post it in my blog ?Thank you!
ReplyDeleteThanks for all the nice comments - I'm glad you liked it!
ReplyDeleteElvira - you would be very welcome to post a photo and a link (though please don't copy the whole thing).
This owl is adorable! love it! I am having a Feature Friday Linky Party and I would love for you to link this up.
ReplyDeleteDanielle @ Blissful and Domestic
http://www.blissfulanddomestic.com/2012/05/feature-friday-linky-party-southern_24.html
Hola .. me ha encantado el Búho es una idea divina ... con tu permiso lo he publicado en mi facebook:
ReplyDeletewww.facebook.com/mypatchwork.antahkarana
y en mi blog:
http://mypatchworkantahkarana.blogspot.com.es/
Con la intención que te conozcan y disfruten de este magnifico trabajo .. mil gracias y besos.
precioso y gracioso me encantan los buhos , un saludo maria, de leganes madrid españa
ReplyDeleteMe gusta mucho el búho, y gracias por las explicaciones.
ReplyDeleteun beso
Luisa
Do you not have any templates to go with the tutorial? they would come in handy.
ReplyDeleteThis is adorable! I'm so glad I came across it. I'm going to attempt to make this for my niece, she has a birthday coming up. If I'm successful, I'll share a photo on this page.
ReplyDeleteThank you,
Tammy
I'd love to see your owl, Tammy! Hope it goes well.
DeleteNot sure if you received my message. I tried to post pics of my finished product but was unable so I added them to my blog. Check them out at PinkSparkleAndLace.blogspot.com
ReplyDeleteThank you again!!!
I love it! Thanks for linking to it - I hadn't had a previous message so maybe one was lost in the ether.
DeleteI must be the only slow one looking at this pattern. While I can sew I need some guidance like
ReplyDeletea list of materials needed for the project, size of the pieces of fabric and the zipper and yes I agree, as I am drawing challenged, some templates for the pieces used. I love the piece and would love to make it for my niece, but am somewhat of a chicken. Maybe if I try with paper first.
That sounds a good idea - I think if you try sketching it out on paper you'll see how it all comes together. I'm not a natural artist, so if I can do it I'm sure you can too!
DeleteLove your owl hopefully I will make it for my great niece.Thank you for sharing.
ReplyDeleteHope your great niece enjoys it, Ellen - please let me know how it goes!
ReplyDeleteAwesome owl. l have a almost 14 months old grandson. I think he would love this and maybe his auntie in NS who loves owls. Christmas gifts indeed. I appreciate your very explicit instructions. Even I can follow. You are a genius with a needle. Thanks for sharing. Can't wait to see the bear. Should be easier I think.
ReplyDeleteThank you for your kind comment! Must get back and try the near - maybe for my little niece...
Deletewhere is the pattern pieces? I cant find them to make this very cute owl.
ReplyDeleteHello - you'll need to draft them for yourself, but if you follow the instructions it should be straightforward - let me know if you have any difficulties and I'll try to help
DeleteI have a three year old grandson and I think he would like one of these. Your instructions were fantastic. Thanks for sharing. Carol.
DeleteLove this, going to make some for my great grandsons!
ReplyDelete