Do you re-use your bottle bags? I'm thinking of those nice paper ones which dress up a bottle and make it look a bit more gift-worthy. I re-use mine - it seems wasteful not to - but always with a niggling awareness that they are never quite as crisp and perfect on a second (or third, or fourth) outing. And I know it's just not so much fun getting a present in less-than-perfect packaging.
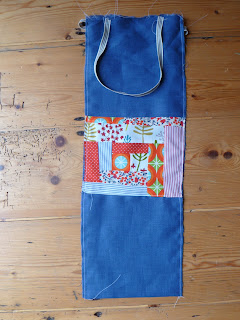
Last month, at the end of term, I had some bottles which needed to be wrapped up nicely for teachers, and found myself with no bottle bags at all. Something must have gone badly wrong in the bottles-in v bottles-out ratio in the runcible house. Luckily I had plenty of fabric. I wish I'd taken photos, but it was a last minute scramble and they were off to school whilst the bags were still hot off the sewing machine. Instead, here's a picture of another fabric bottle bag - this time with a touch of patchwork on the side...
Fabric bags, it turns out, are so much better than paper. They feel reassuringly durable, they look a bit special, and - best of all - they are really, truly reusable. They won't crumple like paper, and, even if they get a bit creased, a moment under the iron will make them look new again.
Here's another - it turned out unintentionally Christmassy, so I'll be putting it away for a few months.
I'm hoping that they are so reusable that they will be passed on, and on, and on... and eventually one might even come back home to me (maybe even with a nice new bottle inside it).
Here's how I made them - it was quick and easy, and used only a fat quarter of fabric and about 30" ribbon.
I started with a piece of fabric 18" by 13"...
... and snipped it in half lengthways...
... and pinned, then stitched, some ribbon on the top edges for handles. 14" for each piece of ribbon makes for a generous length. This edge will be folded over and hemmed, so the handles will be stitched again to make them secure.
I sewed the two pieces together along their bottom edges, right sides together, and pressed...
... then stitched the long sides with wrong sides together and a narrow seam allowance, ready for French seams on the sides. This is where I added the applique panels on some of the bags, with the raw edges of the panels trimmed to match the side seams of the bag.
And I turned it inside out with right sides together to make nice French seams up the sides.
I sewed across the corners at the bottom - the blue line is 2.5", which gives a nice square base to the bag.
Then I folded the top edge twice, and stitched the hem, catching the ribbon handles to secure them.
Done!


